Learn how to seamlessly push contacts from Stotles to your CRM, including Salesforce and HubSpot. Follow simple steps to ensure contacts are correctly assigned and accessible for your team.
Before pushing contacts, you will need to make sure your CRM has been integrated in app. You can find guidelines on how to set up your CRM here.
You can now push contacts from Stotles to your CRM. To do this, follow the steps below:
-
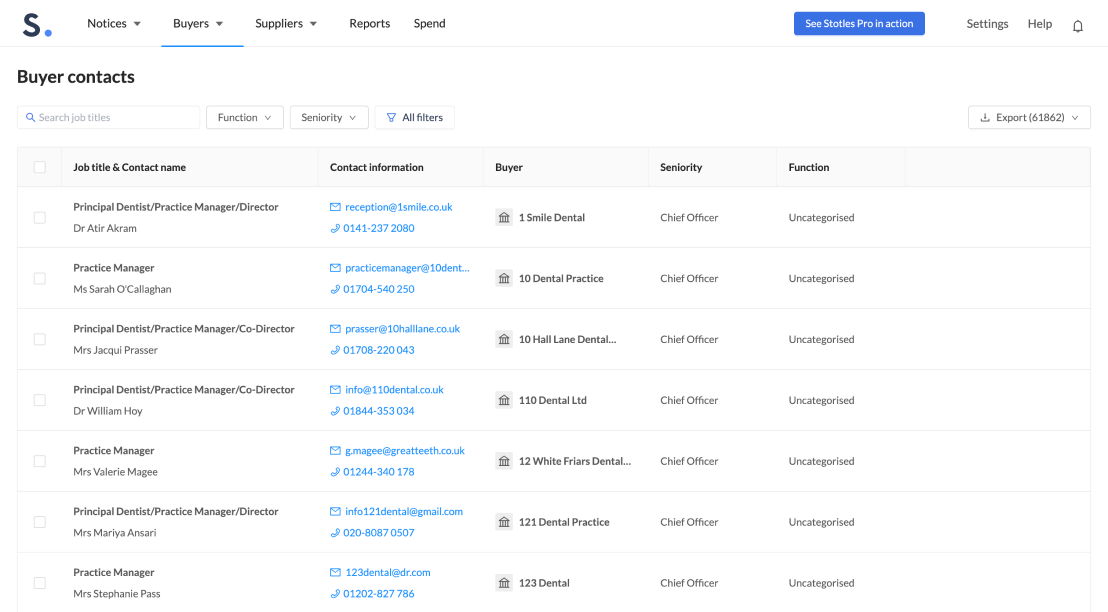
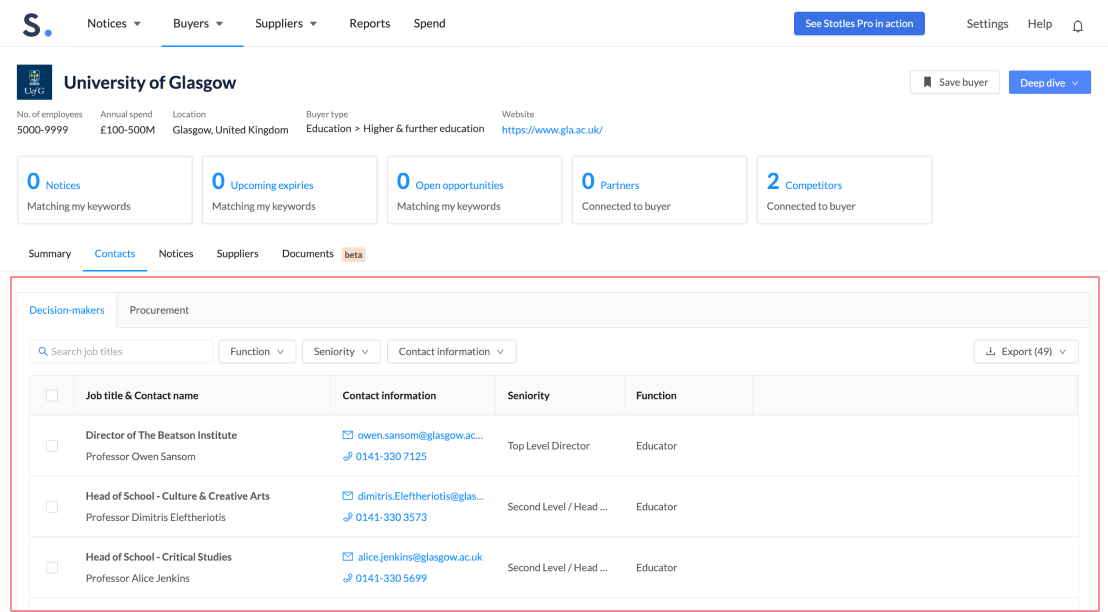
Contacts from our app can be pushed from either the Buyer contacts page here, or in the ‘Decision-makers’ tab in a buyer profile (see images below):
Contacts page:
Buyer profile:
2. Once you find a relevant contact that you want to push, hover over the contact row for the ‘Send’ button to appear. Depending on your integration, this button will have either a Salesforce icon or a HubSpot Icon.
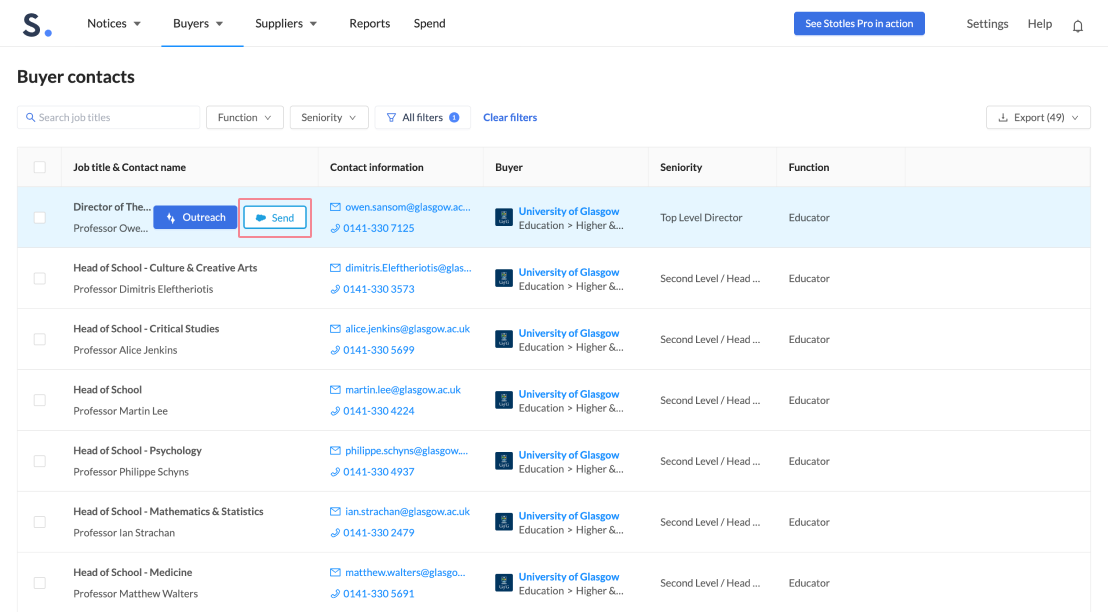
3. When you click send, the contact will automatically be sent to your CRM. You will receive a notification at the top of your screen to confirm it was successfully sent, with the option to view the contact. By clicking ‘View’, the contact will open in your CRM in a new tab.
Note: When a contact is pushed, our system will automatically assign a contact to an account/company that matches in your CRM. If we can’t find a match, we will automatically create a new account to assign the contact to.
.png)
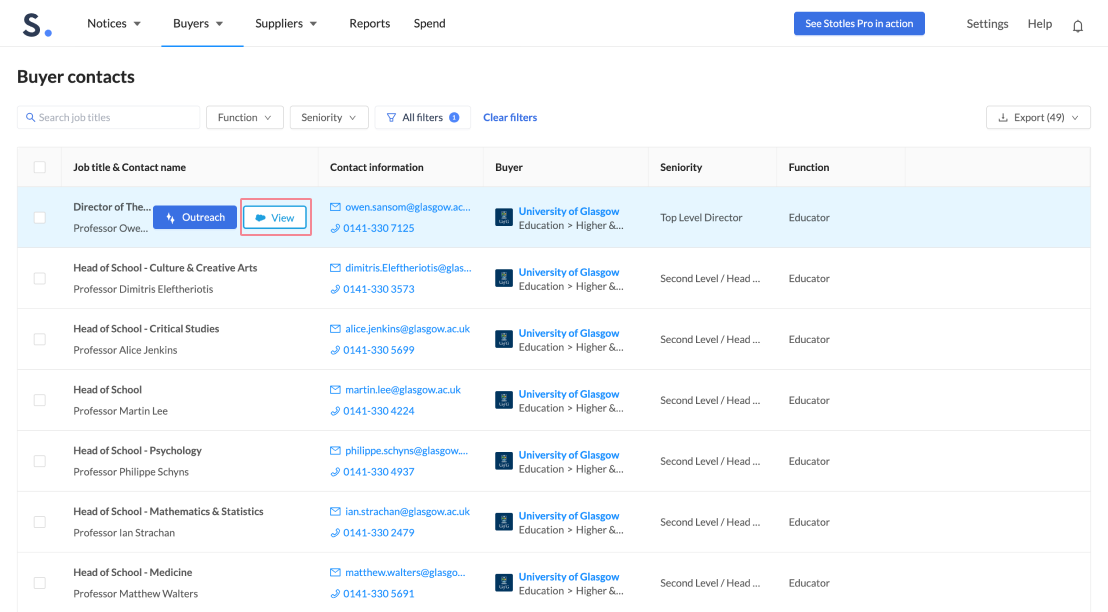
All contacts that have been sent to your CRM will now have a ‘View’ button with either a HubSpot or Salesforce icon depending on the CRM integrated. This means yourself or other members of the team will be able to identify which contacts have been sent to your CRM. Clicking ‘View’ will open the contact in your CRM in a new tab.
If you’re having any difficulties with this feature, or want to share any feedback, get in touch with our Customer Success team via the chat tool.