Learn how to access and customise your integration setup page to efficiently manage CRM fields and streamline the process of pushing notices to your CRM.
Finding the integration setup page
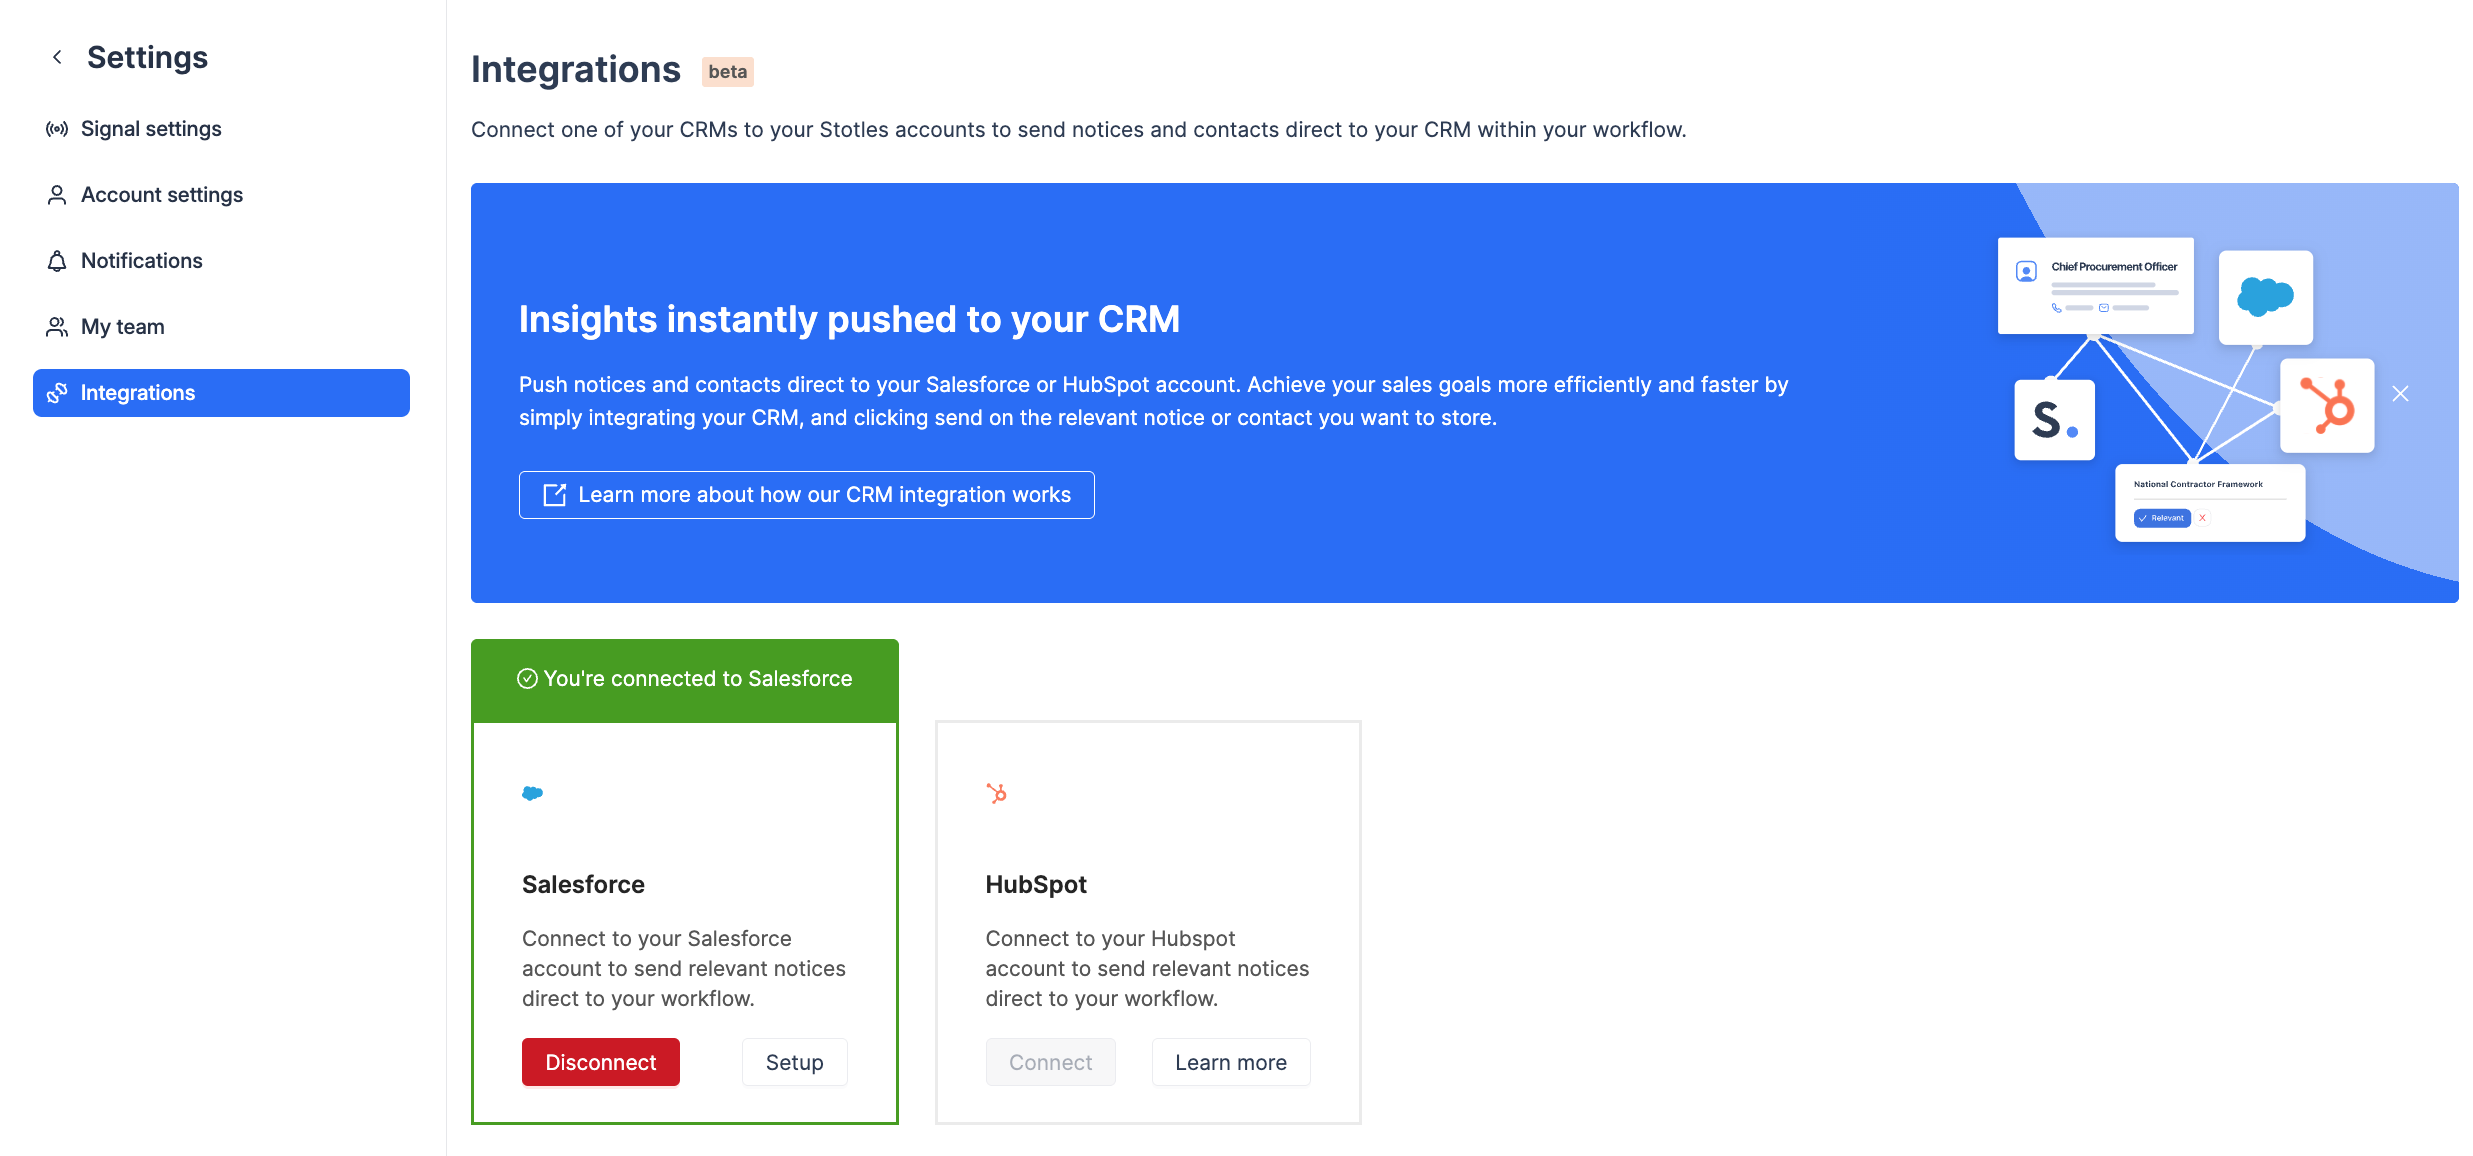
There are two ways you can access your integrations setup page:
1. Go to the integrations page by clicking ‘Settings’ in the navigation, and then ‘Integrations' from the dropdown. On the integrations page, click ‘Set-up’ on the CRM you have connected to.

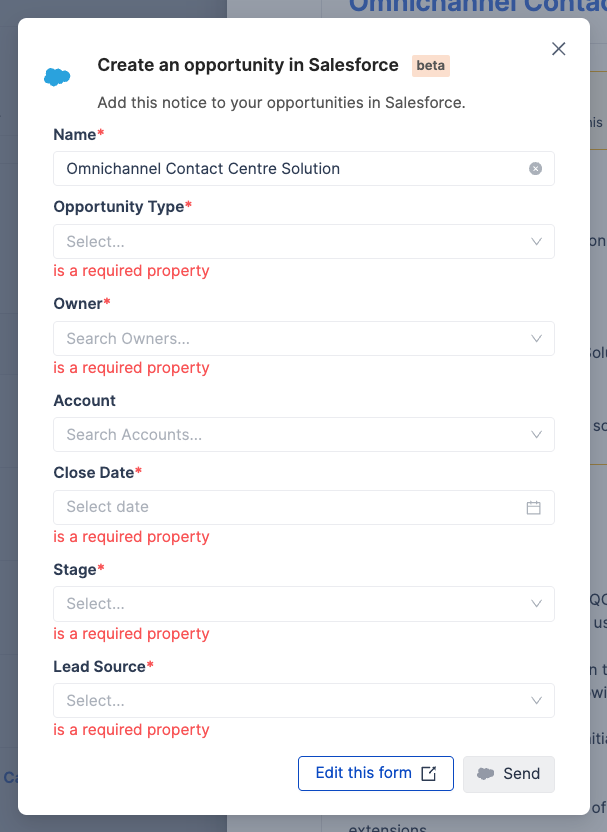
2. When sending items to your CRM objects, you can also access the setup page by clicking ‘Edit this form’ in the bottom right hand corner.

Customising your integration
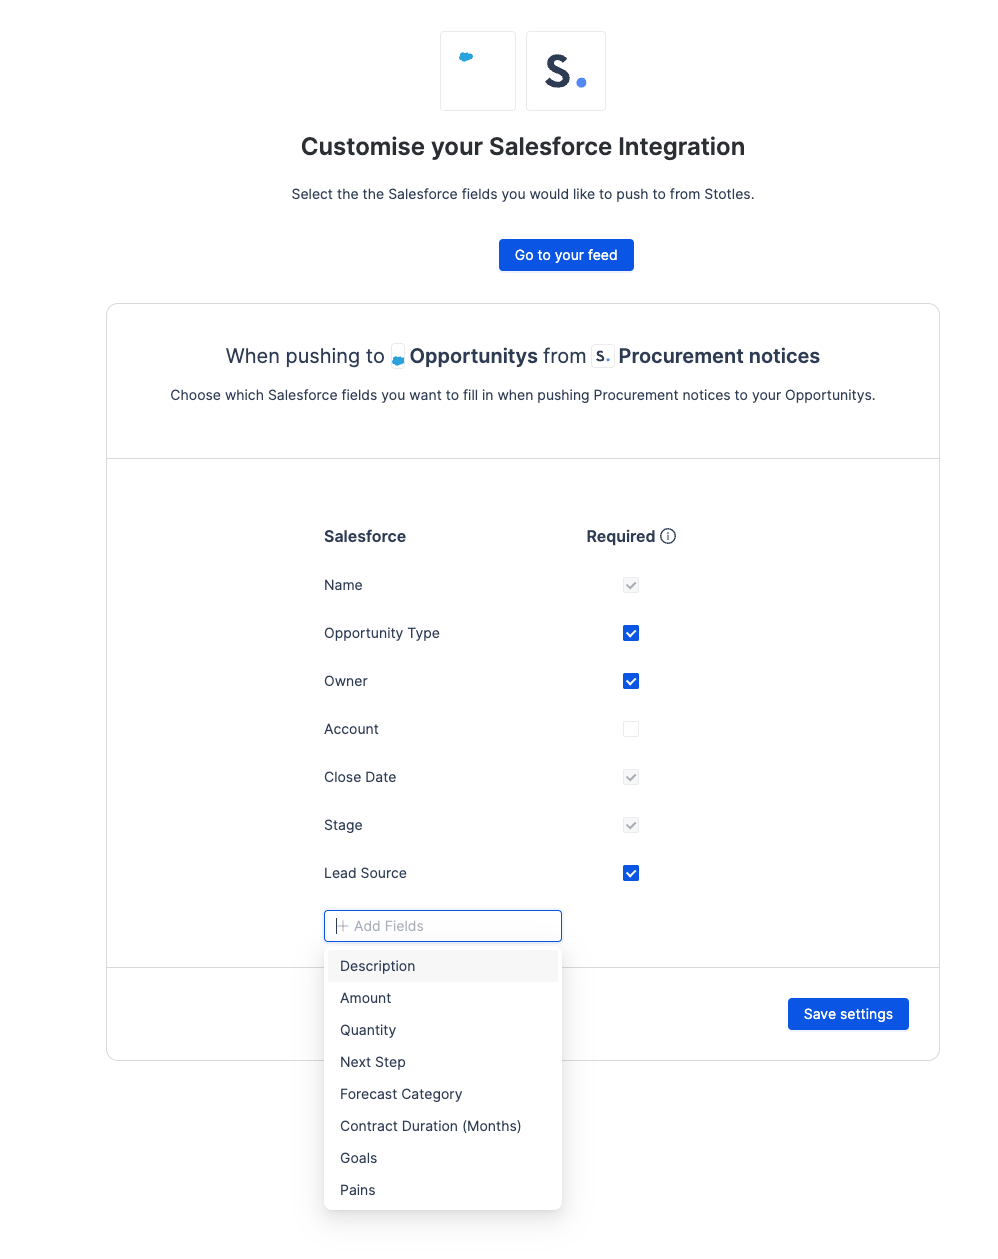
Once you’ve accessed the integration set up page, you can select which fields you’d like to be available when pushing notices to your CRM, as well as decide which fields you want to be required.
-
To add fields, select add field and select from the dropdown of fields currently available in your CRM.

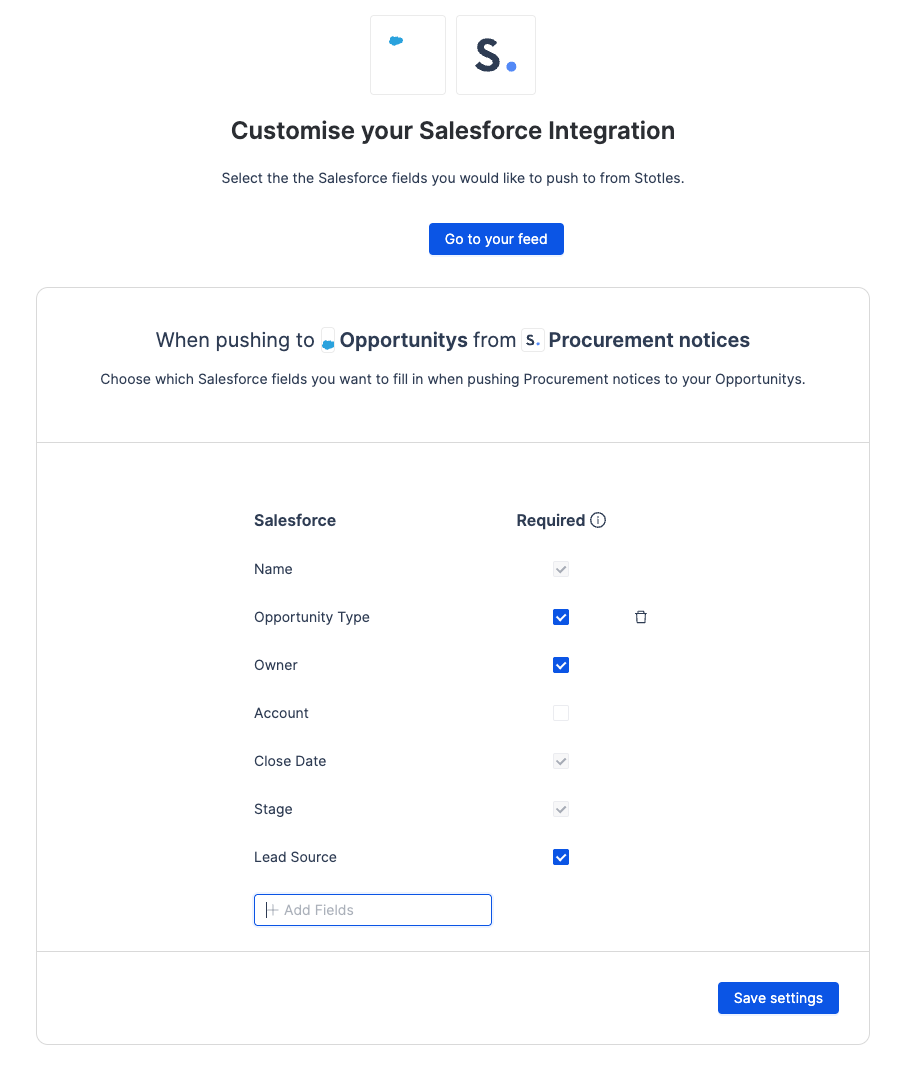
2. To remove fields, hover over the field you’d like to remove and click on the trash can.

3. To mark fields as required, check the checkbox next to the field you want required.
Note: Fields that are currently required in your CRM are automatically required in our app, and therefore the required fields are disabled and cannot be changed.
4. Make sure to click ‘Save Settings’ in the bottom right hand corner before leaving the page, and your send to CRM form should now have the updated fields when pushing notices to your CRM.